Search My Blog!

Use the Search box below to find keywords that you're looking for quickly and easily!

Search Feature

Friday, June 16, 2017

Casting Call...

I am finding myself a bit sluggish when it comes to getting started on The New Orleans again. I looked at the To-Do list I'd brainstormed before I left for AZ - the stuff I need or should do before I attach the ceiling/second floor, and had the old chicken/egg conundrum. Complete brain fog, and honestly what I really needed to do was to become excited about my ideas again.


I decided to just start something, so I reached for the Dremel to drill the holes for the lamp wires to run down through the floor. I had a rough idea where the lamp for the dining room would go - on the buffet, but thought I better just get it out and check the fit and placement. Not wanting to commit to either end at this point, I drilled a hole on either end. I'll make outlet covers later and feed the wires into them so they look more realistic. They may be hard to see in the second photo if you don't know where to look.

The dining room is difficult to access so I turned the house on its side.


Once I had that piece out, I decided I better audition the rest of the furniture and make sure it was all going to fit. I originally planned to have four dining chairs, but after loading everything into the narrow room, I think I'll go with two.


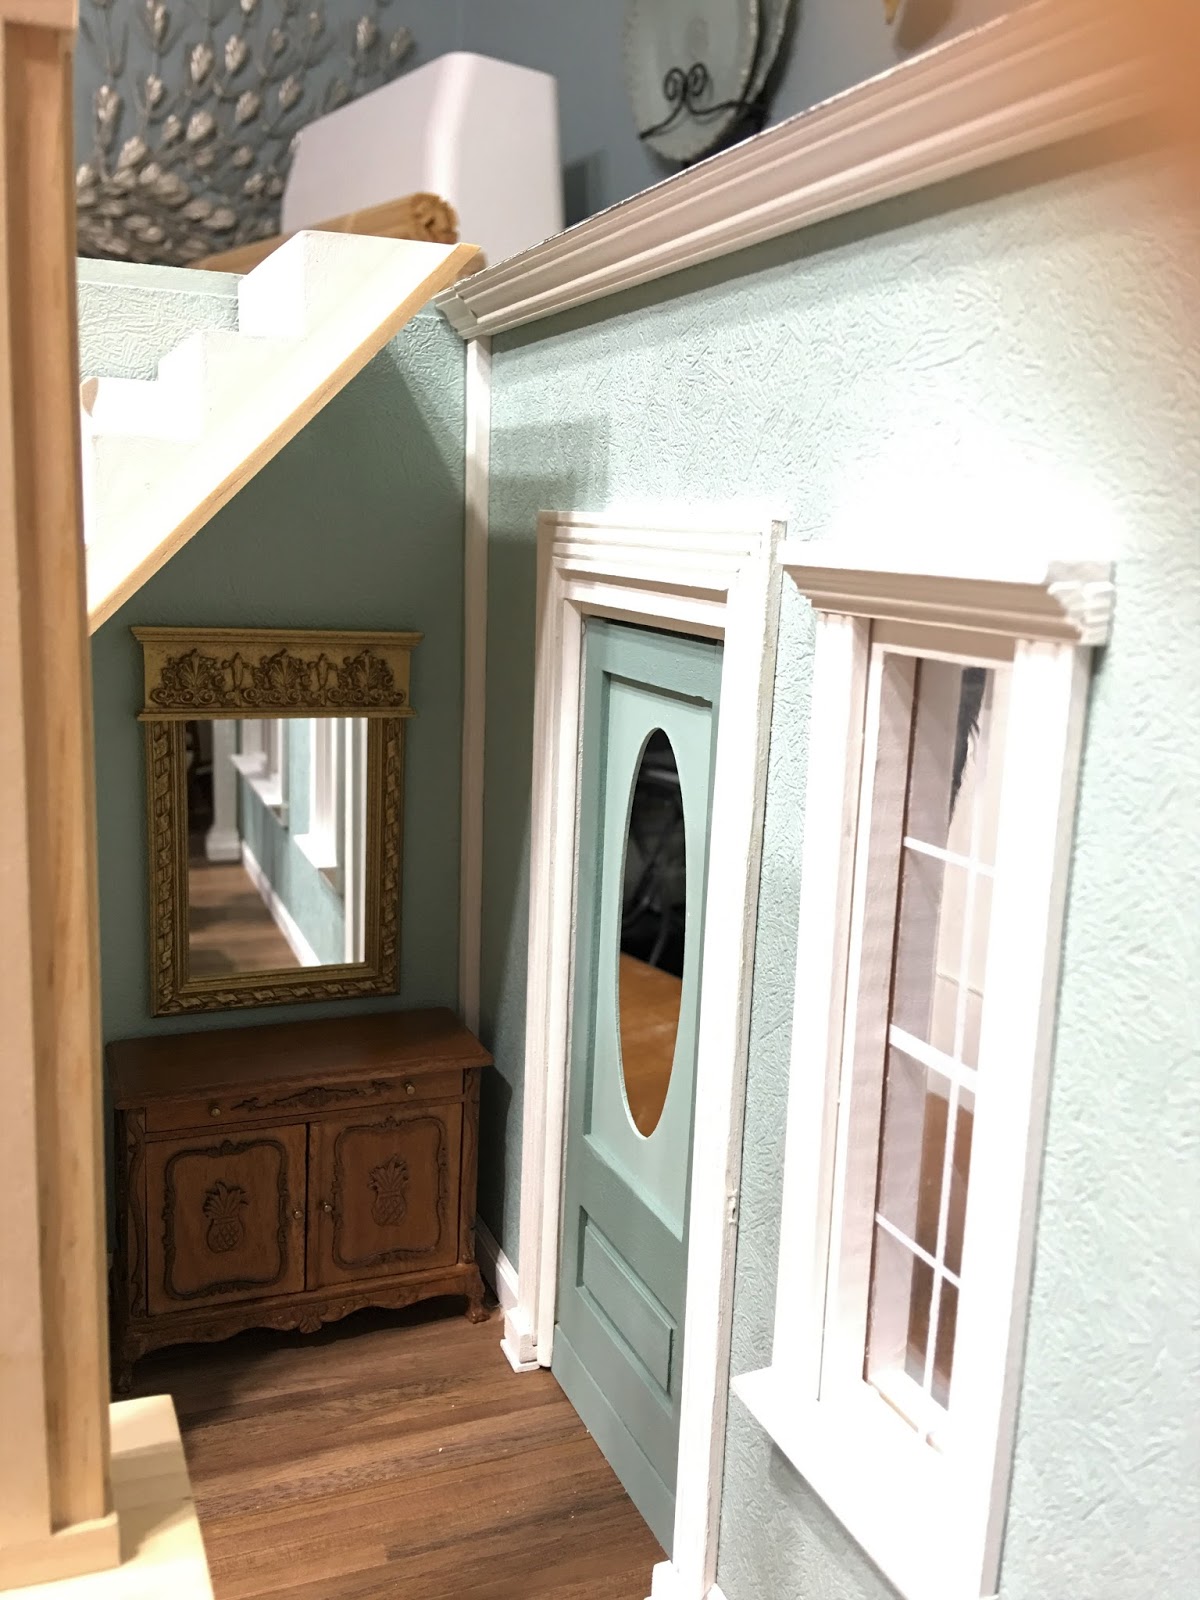
Since I added the larger staircase, the entry space by the front door became very limited in width and height. I exchanged the originally planned entry table with the small buffet because it was narrower. I had a couple mirrors but I wasn't sure which one was going where. In the end I opted for the shorter gilded mirror for the entry space. I'll adjust the height later when I know what lamp and accessories I'll be using here. For now, it was enough just to make sure the pieces will work and to get the lamp wire hole drilled.


I had a small table in mind with a lamp on top for in between the chairs. I am glad I didn't drill the hole in the floor until I checked the fit - with the shelf and column supports there is just no room. Now I'll plan an access hole on top of the shelf so I have the option to place a lamp there. Although there is not much room, I think the two chairs, coffee table and sofa are going to work out fine for the space.


Today I am going to spackle some gaps and touch up the paint. In looking at the photos, I am not thrilled with the white corner moldings and may paint them to blend in with the walls. I'll also decide on window and door hardware and get that installed. I have material to make the window coverings and probably also want to get them made and installed before the ceiling is permanently installed. Oh, and drill a couple more holes for can lights in the dining room, and install the can lights everywhere, and install the power strip plug behind the chimney breast and, and, and...

Okay - I think I'm rolling again. Just hope I don't forget something!

Have a great weekend!

Jodi

Tuesday, June 13, 2017

Back To The Grind...

Hello friends! I'm back home in the northwest, safe and sound, and mom's new place is adorable! Arizona was beautiful and although very hot (108 was the highest temp in Lake Havasu City while I was there), not at all intolerable. Stepping outside from the air conditioning felt like getting into a warm tub and my 48 year old joints felt like they were wrapped in a heating pad! Just one day back in our moist climate has reminded me why lots of people retire to the southwest. Hello again arthritis...


There was lots of moving, lifting, unpacking and shopping for mom's new home. In between and while waiting for the moving truck to arrive, we toured the surrounding areas and got a taste of all the southwest has to offer. I think mom is going to love discovering her new city, and adopting a new routine will be a great adventure for her and my dad.

One of the fun excursions we enjoyed was a trip to the Mesa swap meet. Mom had seen some pottery cut out back-lit scene lamps there last year and knew she had to have them. Can you believe I didn't remember to take a picture? Well, they look something like this, only hers has a saguaro cactus, a jar and a wagon wheel. I have a feeling I may just come home with an empty one on a future visit - imagine the mini scene you could create inside!


Mom also bought her first two pairs of sandals - ever! Yep, she's never owned a pair and now she'll be living in them. Needless to say, we also had pedicures. Her tiny feet and newly painted toes looked stylish and adorable in them! Again, no photo - where was my head?

I got to stop at Auntie Em's in Glendale, and this time we got there early enough so that I could see everything! I made myself right at home, and methodically went through every box and basket of vintage and clearance miniatures. While sitting on the floor in between the pegged lighting displays, another shopper stopped by to ask where the picture frames could be found. She thought I worked there, and oddly enough, I knew right where they were! I found several unique fixtures for the Glencroft kit (third project in line as of this writing)...


And nearly cleaned out a basket of fixtures marked down to $2.50 each. I am thinking these will work well for Brimble's, although starting it is nowhere on the radar at the moment.


I found a mate to the window I picked up there in February - now I have two. I am thinking they will work in the Glencroft's stairwell. There I go cutting walls again! I can't seem to leave well enough alone. The little jug is slated for this build, too.


I found a couple unique doors made by Timberbrook - no idea on their age but I liked that they were unique and marked down. The third door has no makers mark but I loved the shape. If I make a pattern from it I can use it again and again on future builds.


I liked the look of this balcony kit, and although I don't have a dollhouse kit that it will work for, I thought it would make a neat stand alone and space saving little scene backdrop. Sometimes it's nice to have a quick build idea on hand when the big projects become a little mundane.


I found a couple packs of newel posts for the New Orleans stair balcony and a couple carved wall panels that I might use on the upstairs doors. For Brimble's, I found a kit to make a hot dog warmer and condiments.


The next build in the queue is a Christmas cottage. I'll be using the Dura-Craft Columbian kit and I think I've got pretty much everything I need. I was going to build a sink and cabinets, but when I saw these I just couldn't resist them. I want to go totally cutsie with this build, so we'll see where that leads. With less than six months to go until the holidays, I may need to get started on it concurrently with the New Orleans.


And just to prove that I am indeed mad for miniatures and am also an optimistic soul who will apparently be living a long time and be healthy enough to complete several more dollhouse projects before I die, I came home to the kit below which I had purchased using the eBay app on my iPad from Arizona. It was way too easy.


I had been thinking about looking for a Dura-Craft Heritage, but when I've seen them available, I didn't like the asking price or the shipping. $50 for the unopened Linfield was just too good to pass up. And what will I do with it now?


Add it to the pile of future hopes and dreams. :0P

Last but not least, I am woefully behind on my blog reading and commenting. I am going through withdrawal! It is amazing how a 67 year old senior citizen can keep you from sitting longer than 5 minutes at a stretch. Let's just say that it's good to be home with my butt in a chair and so many good blog posts to catch up on!

Back to the grind :0),

Jodi

Wednesday, May 24, 2017

Very Little Progress...

I started to wonder why in the heck I wasn't making encouraging progress on the New Orleans build when it dawned on me: I've been busy doing other real life stuff for the past seven weekends! No wonder! And it's not about to get better any time soon. I am heading down to Arizona with my mom tomorrow morning to get the new retirement house all set up. We'll be gone at least two weeks, and when I get home, we have a family Father's Day camp out. Good thing all of this real life stuff is so fun and interesting - it makes the slow progress on mini dreams more bearable!


I got the enlarged stairwell opening cut, then traced out the rooms onto the ceiling so that I could decide where and how many can lights to add.


I laid out some of the ceiling decorations to help decide on the light placement.


I decided not to put any inside the living room ceiling decoration because I will have the fireplaces sconces and a couple of lamps. I did leave myself the option of adding a ceiling fixture later if it looks like the room needs more light. The hall at the back of the room will have two can lights.


The kitchen is going to be a little more modern, so I decided to plan for four can lights and a possible hanging fixture over the sink. I still have a few left from all of the 3D printing and testing I did for Alki Point.


I'll have two in the porch ceiling in addition to a wall fixture by the door.


The lights I have are spotlight LEDs from JS Miniatures. They come in a set of 10 with the lights and eyelets for around $30 including the shipping from the UK. Although the bulbs are not flush with the ceiling, they are a much more economical option that the Novalyte can lights which run about $12 each. 


They don't seem too intrusive, so I think at 1/4 of the price that they'll work out fine.


Once I had all of the 1/8" holes drilled, I had to make the channels for the wiring. The large hole in the center of the floor is the hub where all of the wires will run to the power strip behind the chimney breast. I basically just marked, scored then chipped out the plywood to make the grooves. Hopefully they are all deep enough or it will mean more sanding.


Oh! One quick tip for getting a good non slip grip - put a silpat under the board or saw. It's nice not to have things move on you! This one is dedicated for minis, and I also use it to cover the cookie sheet when I bake polymer clay.


Here is the ceiling after the ceiling paper has been applied.


And the test fits.


Next I dug out a whole mess of stickers, Dresden and findings to try and come up with the ceiling decoration for the living room. I hope in the end it's not too busy and not too plain.


For the dining room, this is all it needs. The crown starts where the pencil lines are, and because it is behind the kitchen and the arched doorway you will hardly see it at all. I'm going to add a fancy chandelier from the center above the dining room table.


I debated adding the faux tin ceiling in the kitchen, but in the end decided to add it and paint it sea foam. The rest of the kitchen will be white, including the tile, so it was a chance to add some texture and a little color.


Here's the living room ceiling after two coats of ceiling paint. I also added trim to the columns, but haven't gotten to paint them yet.

I hope all of you have a ~W~O~N~D~E~R~F~U~L~ Memorial Day Weekend! I'll post anything interesting and/or mini related while I'm basking in the Arizona sunshine. A Trip to Auntie Em's, perhaps? I hope so!

Jodi