Search My Blog!

Use the Search box below to find keywords that you're looking for quickly and easily!

Search Feature

Thursday, October 12, 2017

Inspirational Time Out

I was really looking forward to starting the outside of the Sweet Christmas Cottage last weekend, so I began to start on the chimney. Better to get that and the electrical camouflage taken care of before figuring out where the gingerbread texture should go. I got some of the chimney structure cut & glued, then suddenly began to feel like I did as a teenager while doing math homework: board. Can you believe that?!? Board working on a dollhouse?!? Well, I was...

So, while I sat there waiting for glue to dry, I spaced out for a while. Then I picked up my phone and started looking through Instagram. That's when inspiration hit me, and I ditched the chimney for more a exciting project. Let's just call this one an interlude.


Here's the inspiration photo posted by lev_vackert, whom I follow. Amazing interior design, styling and photography. Check it out. Anyway, I wanted to try to recreate this scene using stuff I could find and tweak from my own stash. So here is what I did...


I gathered up some supplies and materials from my stash that I thought could work...

Leftover Magic Brik mix and tape, scrap veneer and plywood.

HOM Queen Anne Table Kit, Chair Kit, Laser Cut Window.

Miscellaneous Mini Supplies 
I made a simple two sided display using the plywood for the base and foam core for the walls. I didn't cut the foam core's paper covering through on the inside so that I could use a 1/4" x 1/4" piece of basswood for a corner support.


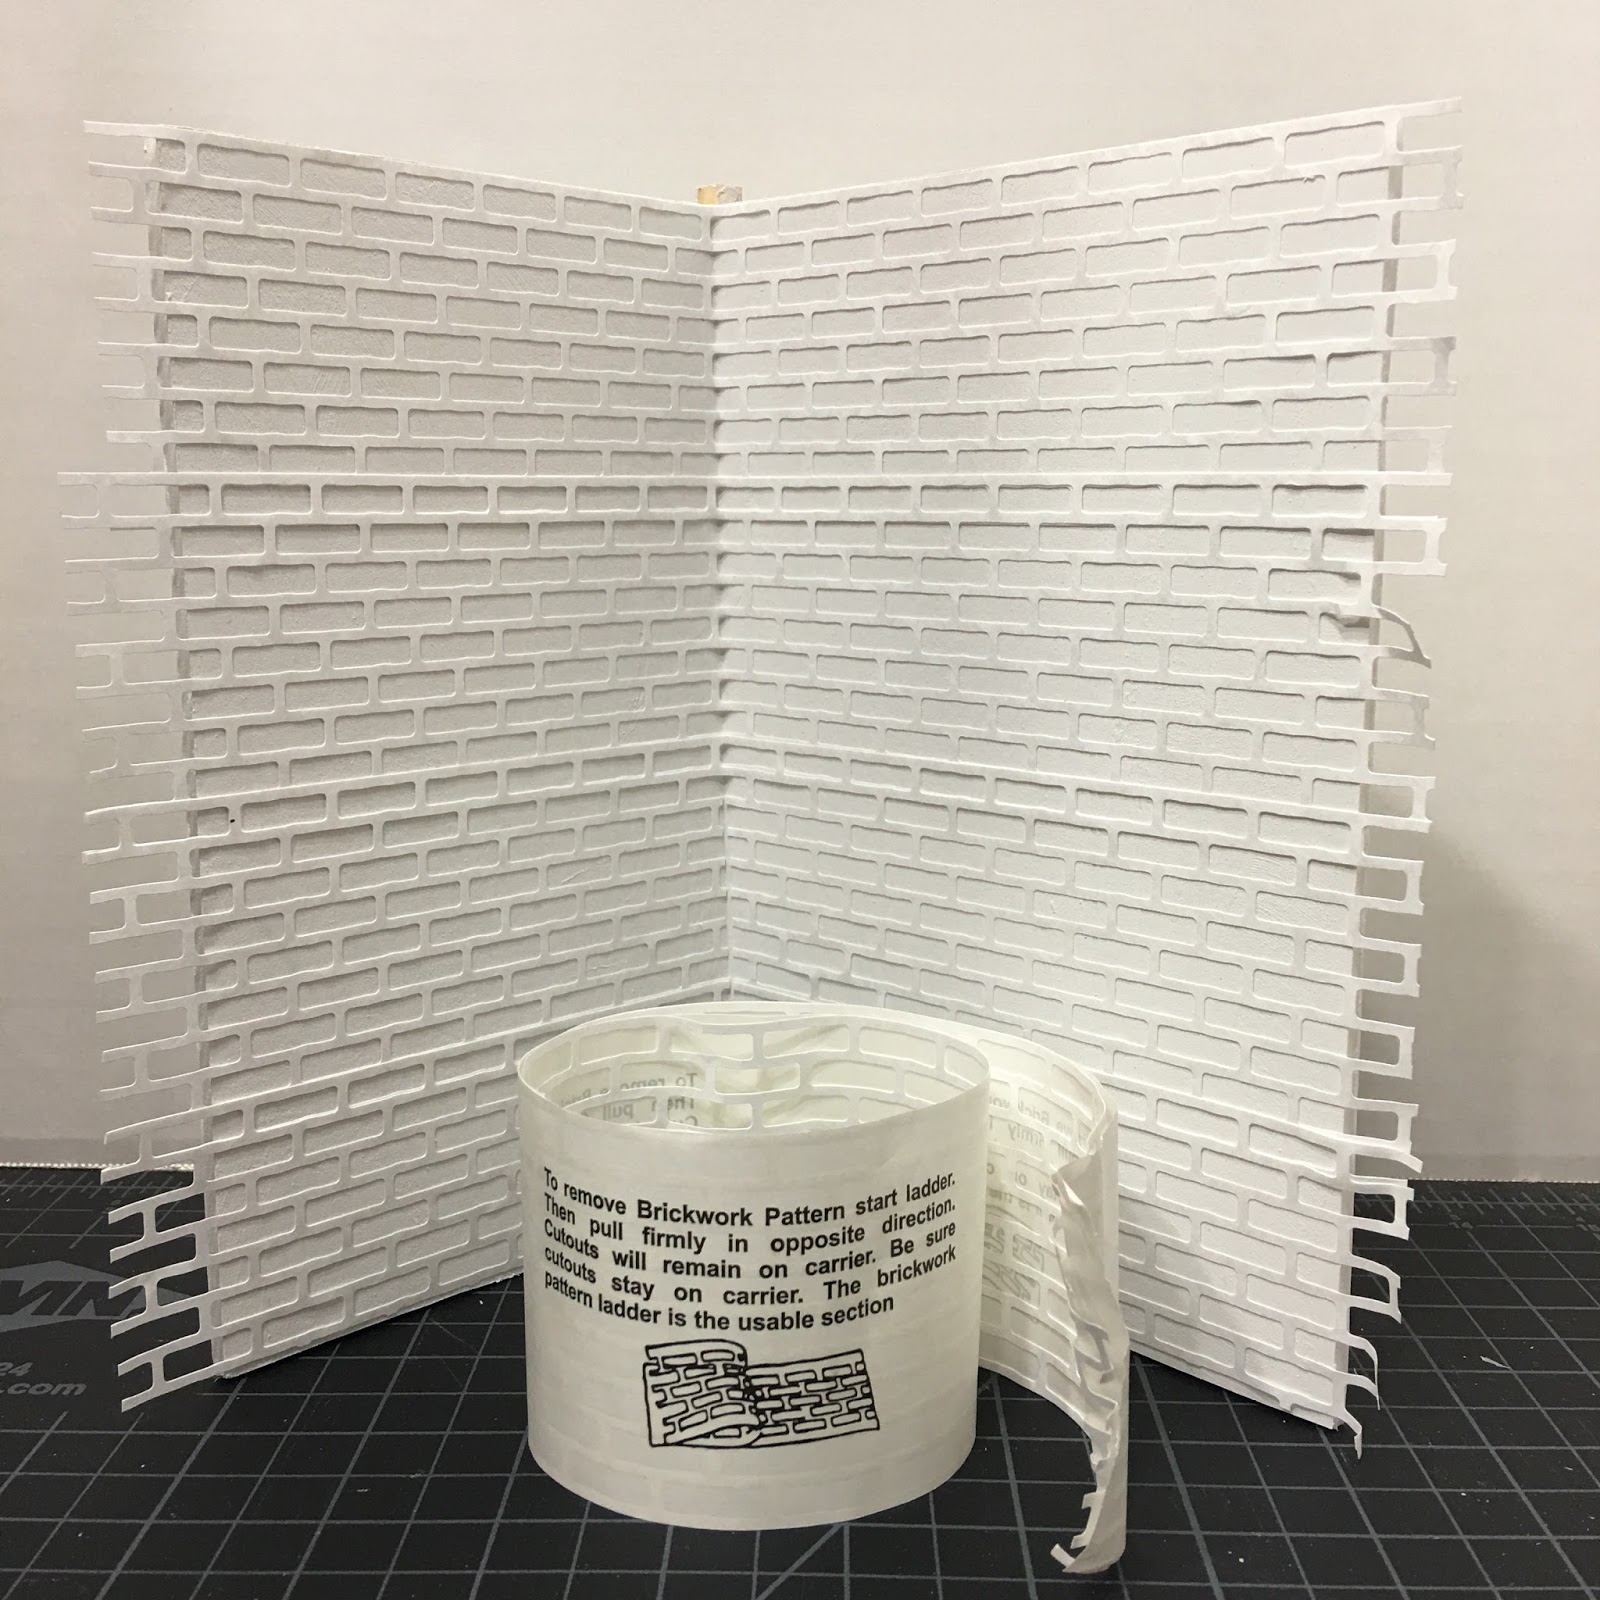
I coated the foam core with gesso to seal it and create "grout" for the bricks.


Then applied the brick sticker and brick material, Amazingly, it was still a perfect consistency after being stored in that RubberMaid container for over a year!


While the brick dried, I turned my attention to cutting flooring strips for the floor from 1/32" wood veneer.


It was really hard to see the exact floor pattern in the inspiration photo, so I had to make a guess. It looks to me as though there is a section, almost covered by what I think might be a piece of floor cloth, that looks like an old cellar door. So that's what I went with.

A tip here on getting a good meeting of the miters. Using double sided tape, I taped down my cellar door frame, letting the corners overlap. Then I cut where the corners met diagonally so that the remaining miters met up in a nice way.


I darkened all of the veneer strip edges and the floor under surface with a Promarker before gluing down with QuickGrip contact cement. It is stinky, but with wood this thin it is the only thing that won't make the wood curl.


Once the floor was laid out, I added some nail holes, scratches, dings and faux wood grain to try to simulate the floor in the photo. At this point the brick was also dry!


Then I added trim to the floor and wall edges...


To finish the walls, I painted the brick and trim in warm white. The original photo has a cooler white, but I like warmer better. I also mixed up some Folkart clear wax and antiquing wax to get a not too dark floor finish. I want to play around with the floor finish a bit more, 'cause I think I can do better.


I put together the chair kit, then began to see what I could come up with for the desk. The finished kit style and height was all wrong, so I "borrowed" some of the pieces to form the base for my own design. I eliminated the real drawer and cut my own for a more simple look. I cut and sanded chopsticks for super simple legs.


This is where I left things this evening. We'll see if inspiration strikes again over the weekend. If I can finish this one up, I'll have a nice bookend for my shelves, and a new mini scene to boot!

Hope you're finding inspiration for new and ongoing minis, too!

xo xo,
Jodi


Thursday, October 5, 2017

Sweet Christmas Cottage - The Bathroom

The bathroom is nearly completed and it was fun to go back through the photos and remember it's humble (and inexpensive) beginnings!


You may remember how I took the Greenleaf die cut kit and gave it a few upgrades...


Using trims made on the Cricut, some wooden legs, and some "real" hardware.


They've come a long way baby!

I had fun making the kit "upgrades", so that's exactly what I did for the wall shelf. Starting out with a Lost Creek Station seed shelf kit, I added more display space and a place to hang the towels. And I exchanged the seed poster with something more befitting a Christmas themed bathroom.


I made up some resin bottles with water slide decal labels, made tiny cotton balls, q-tips and "bath beads" (no hole beads), then gave some misc. items a little more bling with a gold leafing marker. Later I added a Kleenex box (square bead painted with red nail enamel and a tissue peeking out) and a box printie.


To fill in the bathroom, I needed to get into the "accessory making business". I found and printed artwork for painted plastic and metal frames.


I love that Santa in the tub and in the outhouse, and how about little elves warming their frozen toes in tubs of hot water?

I even made a clock (printed clock face) inside a cabochon frame, but you can't see that in place yet - the Glossy Accents is not quite dry and clear yet.


Why two? Well, it wouldn't be a very nice Christmas without gifts... :O)

I used some of the broken off branches from the fragile Christmas tree and some twigs from my stash to make a holiday swag.


And a laser cut sheet of holly leaves, more no hole beads and more twigs for a floor display. The vase is plastic and comes in a set of four from HBS. Really cheap. I just painted it with the gold leaf marker to make it look pricey! ;OP

Oh! And a Squeeze Me tree with a star wand jewelry finding in a Silver Cup Box Feet planter.


Need a sea sponge for the little folk to scrub with? All you need is some Creative Paperclay, a sewing pin and some spongy colored paint...


To fill up some floor space, I thought a little table with a lamp might be cute. I had a Chrysnbon non working hurricane lamp, so I made it a working one. Drill hole, insert candle flame bulb with wires and viola!


Except that the candle flame bulb was too fat to fit inside the chimney. But I just so happened to have a larger chimney which was slated for a future candle/centerpiece so I was back in business!


Hi ho, on we go to make the lamp table...


And then it was too big for the space...


But us miniaturists always have a back up plan...


HOM Candle stand to the rescue! Perfect fit! And then, when it was in and wired to the main wiring, the light stopped working...

A few magic words later, I resigned myself to the idea that sometimes lights just stop working. Usually after having been tested properly all through the process so that you feel confident and glue them in.

I can hear the words from my son's very wise friend Janin now. "Sounds like a Western problem". Meaning: be grateful. It's only a dollhouse light. :O)


All the other lights still work! :OD


Some printed rugs helped to warm up the space and hide the floor paper warp.


Good books to pass the time...


Yep! I'd say I really love it!

Now, I am on to the outside where I need to pick the perfect paint color and experiment with textures. Think Gingerbread...


Have a wonderful weekend!!!

xo,
Jodi

Wednesday, September 27, 2017

Sweet Christmas Cottage - Living Room

The Sweet Christmas Cottage living room is complete at last! And I am so excited, not because I was anxious to get it done, but because now I can just look at it! I am so happy because it captures exactly the mood I wanted!

Photo with old fashion-y effect.
As with any dollhouse endeavor, it had it's share of challenges from the wiring to the space restrictions to the tree. Oh yes! Let's talk about the tree!


As I mentioned in my pity party post, I had purchased what I thought was going to be the perfect realistic looking tree. And it was! Until I touched it. All of the little beautiful branches crumbled off in my hands.


There was just no hope after I began trying to string the lights on. Even trying to re-attach the branches was fruitless. For every one I attached, several more would fall off. It simply was not meant to be...

Doug Fir as it comes.
Because we have no mini shops within two hours of me, I am forced to buy online. I was not willing to spend more of my mini budget to roll the dice. So, I looked through my stash to see what I could come up with. It just so happened that I had a couple Douglas Firs which were intended for the barn. Since I never made it to the landscaping, here they were, waiting for their moment in the sun!

I printed the skirt, from an online photo, onto fabric paper.

Using the branches from one, I hot glued branches to fill out the other. I really liked the effect, so I kept going. Some of the clump stuff came off as I handled it, so I just took time to apply glue liberally and sprinkle the crumbs back onto the plastic branches. I printed the skirt, from an online photo, onto fabric paper.

Front of tree

Right side of tree

Back of tree

Left side of tree
I did this several times before and after installing lights and ornaments, and it was worth the trouble for what it turned into. I LOVE it, and would recommend this method and those trees, especially if you have little money to spend on a mini Christmas tree! Adding the mini gifts underneath made me squeal with delight!
 

Here it is in the room before adding the other furniture.


I showed you the cards made from the digital art in last week's post. Here they are added to the stair stringer.


I made up some rolls of extra wrapping paper and bows, and put them into an aged (resin) basket.


I love the way the fireplace turned out, and couldn't decide which were my favorite photos, so here are several! :O)

Lights on

Lights on old fashion-y effect

Lights off

From the front door, lights off

From the front door old fashion-y

From the front door different effect
 
From the front door lights on
Here it is filled up! Giac, I know it is crowded, but I still hope you love it! :O)


And more angles and effects. I think I might use one of these on our Christmas cards this year!


And a couple of the kitchen, just to remind you of the mood...


And a shot of the bottom floor...


And the whole back to remind me that I am still only 2/5 of the way, including the exterior finishes, done. And Thanksgiving is only eight weeks away!


Yikes! Gotta go now! Much to do! TTYS!

xo xo
Jodi